As an AC technician with over 15 years of experience across Delhi, Noida, and Gurgaon, I’ve seen firsthand how proper installation can make or break the performance of an air conditioner. Many homeowners invest in high-end AC units but overlook critical installation details, leading to subpar cooling, higher electricity bills, and frequent maintenance issues.
Here are my top 10 expert tips for efficient AC installation at home, tailored specifically for Indian households:
1. Choose the Right AC Capacity
Selecting an AC with the appropriate cooling capacity is crucial. An undersized unit will struggle to cool the room, while an oversized one will cycle on and off frequently, wasting energy. For instance, a 1.5-ton AC is typically suitable for a room measuring 150–180 sq. ft. Factors like room insulation, number of occupants, and sunlight exposure also influence the required capacity.
2. Optimal Indoor Unit Placement
For split ACs, install the indoor unit at a height of at least 7 feet from the floor to ensure uniform air distribution. Avoid placing it directly above electronic appliances or heat sources. Ensure the wall is sturdy enough to support the unit’s weight. Proper placement enhances cooling efficiency and prevents unnecessary strain on the unit.
3. Strategic Outdoor Unit Location
The outdoor unit should be placed in a well-ventilated area, away from direct sunlight and rain. Installing it in a shaded spot can improve efficiency by up to 10%. Ensure there’s at least 12 inches of clearance around the unit for optimal airflow. Avoid placing it near dusty or polluted areas to prevent clogging and reduced performance.
4. Maintain Proper Distance Between Units
The distance between the indoor and outdoor units should ideally be between 10 to 15 feet. Exceeding this can lead to reduced cooling efficiency and increased energy consumption. Longer distances require more refrigerant and can strain the compressor, leading to potential breakdowns.
5. Ensure Correct Tilt Angle
When mounting the indoor unit, ensure it has a slight tilt (about 1/2 inch) towards the drain pipe. This facilitates proper condensate drainage and prevents water leakage inside the room. Improper tilt can lead to water dripping from the unit, damaging walls and furniture.
6. Use Quality Mounting Hardware
Always use robust mounting brackets and hardware to secure both indoor and outdoor units. This minimizes vibrations and noise during operation. Ensure the brackets are rust-resistant, especially for outdoor units exposed to the elements. Proper mounting also ensures the longevity of the units.
7. Proper Insulation of Refrigerant Pipes
Insulate the refrigerant pipes adequately to prevent energy loss and condensation. Use high-quality insulation materials to ensure durability. Proper insulation maintains the efficiency of the cooling cycle and prevents water dripping from the pipes.
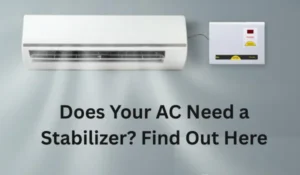
8. Ensure Adequate Electrical Supply
Before installation, verify that your home’s electrical system can handle the AC’s load. Use dedicated circuits with appropriate circuit breakers. It’s advisable to install a voltage stabilizer to protect the unit from voltage fluctuations, which are common in many parts of India.
9. Test the System Post-Installation
After installation, run the AC for at least 15–20 minutes to check for any anomalies. Ensure that the cooling is uniform, there are no unusual noises, and the drainage is functioning correctly. This initial test can help identify and rectify issues before they escalate.
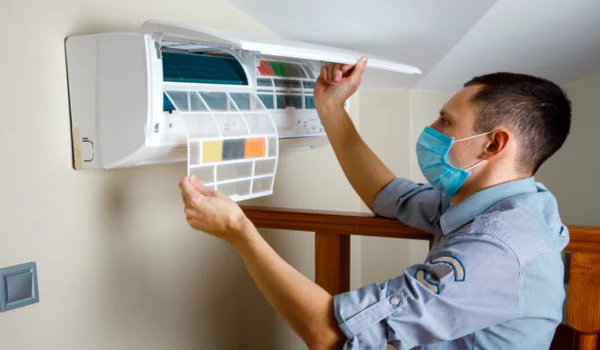
10. Schedule Regular Maintenance
Regular maintenance is vital for the efficient operation of your AC. Clean or replace filters every month during peak usage. Schedule professional servicing at least once a year to check refrigerant levels, clean coils, and ensure all components are functioning optimally.
📊 Quick Reference Table
| Tip No. | Key Focus Area | Importance |
|---|---|---|
| 1 | AC Capacity | Ensures efficient cooling and energy savings |
| 2 | Indoor Unit Placement | Promotes uniform air distribution and prevents strain on the unit |
| 3 | Outdoor Unit Location | Enhances efficiency and protects the unit from environmental damage |
| 4 | Distance Between Units | Maintains cooling efficiency and reduces energy consumption |
| 5 | Tilt Angle | Prevents water leakage and protects interiors |
| 6 | Mounting Hardware | Reduces noise and ensures unit stability |
| 7 | Pipe Insulation | Prevents energy loss and condensation issues |
| 8 | Electrical Supply | Protects the unit from voltage fluctuations and ensures safe operation |
| 9 | Post-Installation Testing | Identifies and rectifies potential issues early |
| 10 | Regular Maintenance | Prolongs unit lifespan and maintains optimal performance |
By adhering to these tips, you can ensure that your air conditioner operates efficiently, providing optimal cooling while minimizing energy consumption and maintenance costs. Proper installation is an investment in comfort, efficiency, and the longevity of your appliance.
If you have any further questions or need assistance with AC installation, feel free to ask!